Mad about Maitake!

First Hen of the Season!
With the nights getting cooler, the air a little crisper, and leaves starting to turn and fall, autumn is definitely here! But with the season comes some fantastic treats! Chicken of the Woods is still hanging around, and one of my favorites, the Hen of the Woods.  Also known as Maitake, this mushroom starts sprouting up from around the beginning of September until as late as November depending on the weather in your area. After the first good week of cool nights is usually a good indicator of when to get out and start looking.
From what I gather from my own experience, and reading those of others, the Hen almost exclusively grows under oak trees, usually the large, older ones. Although, many have found them under Maple as well. They like banks, usually where water can runoff, and usually on the SW facing bank.  These guidelines aren’t set in stone, but they can lead you in the right direction.

The Hen of the Woods actually has no poisonous look-a-likes at all! In fact, they really don’t have any thing that looks like them. They come in all sizes and color variations. However, if you see a small cluster and have the time (and the patience!) leave it for about 4-6 days and it will be a LOT bigger when you return. Foragers have reported getting clusters of 50-100 pounds of this mushroom in one go! The colors can range anywhere from white to a dark grey, with the cap usually getting darker closer to the edging. They actually get darker as they are exposed to more sun! It’s a polypore (just like the Chicken of the Woods) which means it has no gills, but a smooth porous underside. It grows in big clusters, with each cap overlapping the one below. They get their name because they actually look like a ruffled hen! Be sure to cut carefully at the bottom, and next year, you may have a feast growing in the same spot!

Check out all the different color variations!

Sauteed up with some Chicken of the Woods!
The taste of these mushrooms is what makes them so sought after. I sauteed them in some butter and broth with some onions and a little chicken of the woods I found. They have a very meaty texture and flavor, and can almost be compared to a steak or a nice cut of beef. They hold up well, and add a woodsy, hearty flavor to any meal. They are also a great meat substitute, and can be prepared as such.
So, get out there now and start looking! And as always, happy hunting!

Staying Safe

So, recently I was out and about teaching a friend about some of the edibles in the area. When we came across a giant patch of Jack-o-Lantern mushrooms, I pointed out how similar they were to Chicken of the Woods or Chanterelle to an untrained forager. I also pointed out that while not deadly, they are extremely toxic and can cause severe sickness if ingested.

This got me thinking that I really need to write about the importance of proper identification of wild edibles. In almost every blog I have written I have pointed out several look-alikes and how to tell the differences between whats delicious and what should be left behind. My motto is always “When in doubt, throw it out” and I stick to that!
Destroying Angel

Most of the things I have been posting on the blog are very easily identified, and don’t have any deadly counterparts. However one mushroom that I will be posting about soon (its almost in season) is the Shaggy Mane, or Inky Cap. Now, while in full adult form, its unmistakable, the young mushrooms (or buttons) look exactly like the deadly Destroying Angel. Small puffballs also look just like this mushroom. I recently ran across this article, which I found extremely interesting. It just reminds us the importance of taking your time to identify, and always using caution when eating something from the wild.

Its not just mushrooms that can cause problems! Hemlock flowers look dangerously close to Queen Anne’s lace, and are extremely poisonous. You can see the differences in the two here. Fiddleheads can all look exactly the same to the untrained eye, and only one species is properly edible. Although none will immediately make you sick, some have very high amounts of carcinogens in them, and are best avoided.

A few tips to help identify wild edibles:

Spore Prints. By making a spore print of a mushroom, you can tell almost immediately
Spore Print
what type you are dealing with. This article is a great example of how to make spore prints.
Not only that, but they are fun to make, and perhaps a great learning project for children!!
One of my favorite books!


Books. There are tons of resources out there. From your local bookstore, to the internet (heck, maybe even this blog?), use every resource available to you! The more you know, the better you will get!


Observation. What type of trees are they growing around? How are they growing? On the tree? Under it? Watch the plants for a year. Are they Ostrich ferns (edible) or a Braken fern (no s’good)? Watch them grow through the summer, and identify them in full form. You can come back next year and collect! Being patient can be difficult sometimes, but will always pay off in the long run.

Ask a Pro. Quite a few people have asked me to take them out. I am by no means an actual ‘pro’, but I do know what I’m doing enough to teach others. There are forums, events, and usually a local source you can find that would love to take you out and about! All you have to do is ask around!

Just always remember to be careful, stay educated, be observant and have fun!
So be safe and happy hunting!

Black Beauties

Nice Day of Harvesting!
A couple of weeks ago, after almost a full summer of nothing but rain, I was out harvesting a very nice lot of Chanterelle when I decided to try a new trail.
After about thirty minutes of not finding anything I was about to give up. I stopped, looked around, and just happened to look down at my feet. Low and behold, I had found a mess of black trumpets! Now, I haven’t been foraging for long (about 3-4 years), and this was my first black trumpet find. Needless to say I was beyond excited! After that, I realized my new trail was FULL of black trumpets, and I’ve been going back frequently for more.


Notice the "trumpet" shape and furled edging.

Black trumpets are one of the easiest mushrooms to identify. However, they are also one of the hardest to see! They are greyish/black in color, and tend to blend right in with the foliage. Much like the Chanterelle, they are ‘horn’ shaped, but the edges furl outwards instead of in a ‘wave’ like a chanterelle. They are also unique in that they have no gills at all, just a nice smooth underside.

Black Trumpet cluster on the moss covered trail!


They are fairly fragile, and can rip very easily, so be gentle when pulling them from the ground. I also found that the largest clusters of them were around moss (in fact, the entire new trail I was on was covered in moss), which also makes it a little easier to spot them. Much like my motto with morels, “if you see one black trumpet, stop and look around! There are sure to be more”. They also favor areas near seasonal streams and washes. Dark, damp places are the best for these beauties! Black trumpets are a weather-permitting summer-fall mushroom, meaning, the more rain the better! After my first initial find, I had left a few of the smaller ones to grow a little bigger. After about 5-6 days with no rain, I had gone back only to find they had all withered and were no longer edible. 
Devil's Urn Mushroom
This mushroom has almost no look alikes, the only exception being the Devil’s Urn, and it only shows up in early to mid spring. The Devil’s Urn is not poisonous, just not very good. 

Yummy Black Trumpet Gumbo!!
The best part about these mushrooms? The taste!! Out of everything I had harvested so far, these have been my favorite. They have a earthy, smoky flavor and are wonderful sauteed alone, or in any mushroom dish. They also make great sauces! Before you cook them, however, be sure to carefully and gently wash them. The smooth surface tends to allow dirt and debris to cling to it.

The first day I made them just plain so that I could really get the rich flavor. The next day, though, I made a wonderful black trumpet gumbo! What a great flavor they brought to the entire dish!


This time of year is always so great for good finds (when the weather cooperates)! So, put on those hiking shoes, a little bug repellent and happy hunting!!

Enchanting Chanterelles

First One of the Year!
Its been a hot, wet and humid summer so far in East Tennessee! We had three solid weeks of rain. While it’s not so good for the kids on summer vacation, it’s great for mushroom lovers. The heat and rain make perfect conditions for Chanterelle!
Chanterelle are one of the most prized mushrooms among kitchens everywhere. Chefs love them, and although you can buy them dried in a market, finding them on your own is so much more fun!
The Chanterelle season is a fairly long one. It can start as early as May and lasts until late fall. What I have found (at least in this area) is once temperatures get over 85, and after the first really great rain (about a good 4-7 days), is when you can start looking. They love the hot, humid weather! Chanterelle typically grow in groups, so if you spot one, be sure to look around the area for more.
With its bright yellow to orange hue, there is almost no mistaking this beauty. Its not a true gilled mushroom and with each of the species the underside changes slightly. It could be smooth, wrinkled, or have vein-like gills. Luckily all varieties of Chanterelle are edible, so unless you have an allergy, they will all be safe to eat. However, that being said, they do have one look-a-like that is poisonous.
Jack-O-Lanterns on a tree base
 The brightly colored Jack-o-Lantern mushroom can cause extreme stomach upset, and should be avoided. They can be distinguished from the chanterelle in a few ways. Chanterelle give off a slight smell of apricots, which can help with identification. The cap is not as ‘flowered’ as a chanterelle is, but rather smooth and lacks the ‘trumpet’ shape chanterelle are known for. The gills are an actual gill, and do not flow flush with the stalk, and also lack the vein-like appearance in between each gill.

Glowing in the Dark!!
Did I mention Jack-o-Lantern mushrooms glow in the dark?! The glow is caused by the presence of luciferases, which is a bioluminescent, similar to that found in fireflies. If you take this mushroom into a dark closet and let your eyes adjust, you will see the faint, eerie green glow coming from its gills. Jack’s also tend to grow from or on the base of trees in large clusters, whereas chanterelle will grow straight from the ground with just one or two mushrooms together (much like morels).

Before I actually found my first chanterelle I was hoping every bright, upturned mushroom I found was one. I wasn’t exactly sure what I was looking for at first, but once I found an actual chanterelle, there was no mistaking it for anything else. Once you find them you will know right away!

When I was out this past week I was trying to take note of where I found each one. What trees did they grow around, what type of soil, and moisture. I decided they really don’t have a specific rhythm or reason to where they grow. Under Ash, Pine, Oak, Sycamore...they were all over! Very moist, rich soil with good leave coverage is what they prefer, so deep woods are a great place to start looking!
Once you find a nice good harvest of them, head home and start cooking! Make sure you clean them well, and check for bugs. The woodsy, light flavor of this mushroom makes it go well in any meal you would use mushrooms in. They are good in a refrigerator for a few days, or if you would like to keep them for later use, they can be dehydrated. Dehydrating will make for a richer flavor, but the texture gets a bit chewy. The dehydrated chanterelle are usually best for soups and stews. You can also cook and freeze them fairly well, lasting up to about a year. I look forward to harvesting this mushroom for the next few months. So get out there and look around!
Happy Hunting!

Sweet Taste of Summer!

The summer heat is upon us, and with it brings lots of new things to add to our kitchens! One of the most abundant forageable plants this time of year is the Wild Carrot (Daucus Carota). Or, as you may know it, Queen Anne’s Lace! Scattered along the road side, or growing high in a field, this beautiful flower can be found almost anywhere, and usually in abundance. In fact, I harvested some today on the side of my driveway. 


Though most people consider this plant a weed, I can’t wait until they start to bloom. There are so many uses for it, mostly medicinal, but my favorite thing to do with this plant's flower is make jelly!
Before we get into the jelly making, I wanted to point out a few other things this plant is used for.  As mentioned before, its called “The Wild Carrot”. This is because it belongs in the carrot family, and when the plant is very young, you can dig up its long tap root, and eat it just like you would a regular, garden grown carrot. Sadly, once the plant is large and begins to flower, the root becomes woody and is not fit for consumption.

The flowers themselves have long been used in teas and other concoctions for medicinal purposes. One of the most common uses for it was as a form of contraceptive, done by ingesting the seeds with a glass of water shortly after ‘incident’. The teas made were also used to treat kidney stones or other urinary tract issues by flushing out toxins; diabetic’s commonly used the herbal infused teas to lower blood sugar; and it was also widely used as a diuretic.

Before you start harvesting away, I do want to point out that Queen Anne’s Lace (QAL) does have a deadly look alike! The hemlock flower looks extremely similar to QAL, and in fact, last year, I almost made this mistake myself. Fortunately there are a couple of tell-tale signs to tell them apart. Hemlock flowers are more branched than those of QAL, and if you notice in the picture, Queen Anne’s has a small purple flower right in the center! The other easily detectable difference in the smell. QAL smells like, what else? Carrots. Hemlock has quite a nasty smell to it, which is very distinct.

 Once you are sure you have the correct flower, cut away! Cut the flower just below the blossom, but
keep it in one piece. If you are going to make a batch of the jelly, anywhere from 13-18 flower heads will be all that you should need. 
Don't forget to wash your jars!
Once you are home, you are going to want to remove all the bugs that find queen anne’s lace equally tasty! I do this by getting a large bowl, and submerging them in cold water for about thirty minutes. I recommend doing this outside. There are usually a few larger bugs, but what you can’t see are the small, white spiders, and hundreds of little mites that commonly live on this plant. Doing this outside prevents them from getting in your house. After about thirty minutes, remove your flowers from the water, give them a good shake, and place them in your pot. Add about 4-5 cups of water, and bring them all to a rolling boil. Continue cooking at this temperature for about 10 minutes, then remove the brew from the heat.

Just before the boil!
Let it seep anywhere from 30 minutes to a couple of hours, by covering it and keeping in the heat. Once you are ready to uncover the mix, take the large blossoms out of the pot. I usually squeeze the access liquid out, to make sure all the nectar has be drained. Take a large bowl, cover with cheesecloth, and drain the remaining liquid over it. The cheesecloth will catch the access petals, pollen bits, and any small remaining debris. At this point you should have a bowl of very clean brownish-green liquid. Place this in a large pot, add your lemon and pectin in, and bring it up to a rolling boil. Add your sugar, and bring it back up to a rolling boil again. Boil for 1 minute, and remove it from the heat (I always add about two small drops of red food coloring for a nice pink tone). Now your mix is ready for canning!

The jelly that Queen Anne’s Lace makes is a mix of citrus and honey, with a light taste that is excellent on English muffins, toast, or biscuits. Canning is an excellent way to be able to enjoy this plant all year long!
Until next time, Happy Hunting!


Queen Anne’s Lace Jelly
The finished product!


18 large, fresh Queen Anne’s lace heads
4 Cups water
1/4 Cup lemon juice (fresh or bottled)
1 Package powdered pectin
3 1/2 Cups + 2 Tbsp. sugar

Bring water to boil.  Remove from heat.  Add flower heads (push them down into the water).  Cover and steep 30 mins.  Strain.
Measure 3 Cups liquid into 4-6 quart pan.  Add lemon juice and pectin.  Bring to a rolling boil stirring constantly.  Add sugar and stir constantly.  Cook and stir until mixture comes to a rolling boil.  Boil one minute longer, then remove from heat.
Add color (pink) if desired.  Skim.  Pour into jars leaving 1/4” head space.  Process in hot water bath for 5 mins.

Watch Your Back!

I love summer. I love the colors, the sounds, the plants!
But there is one thing I hate about summer: Ticks! I am usually the type of person that has no issues with bugs, or anything that creeps. But ticks, no thank you!
I’m pretty careful to always do a ‘tick check’ when I get home from being in the woods, and I highly recommend that if you are in the woods you do the same from time to time and at the end of your hike.
I have noticed this year, because of the unusually warm winter, that ticks are out in abundance. One common misconception is that ticks will ‘jump’ onto you as you pass by a tree. While its true they can sense body heat, and may fall onto you when you brush past a tree branch, the most common place ticks can be found is in high grasses. Fields or a thick-with-underbrush forest floor are the worst places for ticks!

It’s not so much the ‘bug’ factor that bothers me about ticks, its the diseases they carry. Because ticks feed on blood, whatever they carry is easily transmitted to humans.
Most people are aware that ticks carry Lyme Disease, and Rocky Mountain Spotted Fever seems to be showing up a lot this year. But did you know ticks can carry other diseases such as Anaplasmosis, Babesiosis, Ehrlichiosis, and Southern Tick-Associated Rash Illness.
If you are going to be out in the woods, be sure to use some sort of protection. High socks, long pants, long sleeves and hats are great, but lets be honest, who wants to wear all that on a 90 degree summer day?
A deep woods bug spray that states it works on ticks may help in repelling, but I tend to lean more towards natural and homemade remedies such as the one below.

~
10 to 25 drops of Rose Geranium essential oil
2 tablespoons vegetable oil (olive oil is fine)
1 tablespoon aloe vera gel (optional)

Combine the ingredients in a glass jar. Shake to blend. Dab a few drops on your skin or clothing.
~

Make sure to you know how to Properly Remove a tick!

I’ve also heard that if you place a few dryer sheets in your socks and pockets this works as well!

So, just be safe, and take proper precautions when you are out and about in the woods, and Happy Hunting!

Who You Calling Chicken?

With the cooler days of Spring and Morels behind us, summer foraging season is already in full swing! There are so many great things out there from now until fall, it may be hard to keep up!
But there is one mushroom that is actually out early this year that will, when harvested properly, continue to grow and produce until late fall. Not only is it one of my favorites to eat, but its also one of the most vivid and spectacular looking mushrooms out there!
With its bright orange hue, and beautiful fanned shelves, the Chicken of the Woods is easily spotted from far distances. The first one I ever found, I spotted from about 300 yards away!

Chicken of the Woods are part of the polypore family of mushrooms, which are a fairly distinctive group of fungus! They are typically a tough, almost leather like mushroom, with no gills, and no stalk. They typically grow on the side of trees, or sometimes right out of the ground in giant masses. There are a few really distinct features about Chicken of the Woods, which separates them from other shelf mushrooms. First of all, the color, as I mentioned before is almost fluorescent orange which is a dead give-away. If you cut away a piece, and look at the under-side of the mushroom very close up, you can see small pores all over the surface (thats where they get the name polypore from!). The final feature, which I personally find really neat, is this mushroom holds a LOT of water. When you are harvesting it, if your hands are not dripping with water by the time you are done, then the mushroom is probably past its prime.

Lets look at a few important tips about harvesting this magnificent beast!

Chicken of the Woods grows ON trees. As I have mentioned before, ALWAYS know what type of tree it is growing on. Polypores are parasitic in nature, meaning they take nutrients and toxins in from the tree they are growing on. NEVER harvest a mushroom growing on hemlock!


Always just trim the outer edges for eating!
Always cut just the outer edging of the mushroom. This keeps the root system intact, so that it can continue to produce throughout the year! Not to mention, the inside is really tough and not very pleasant to eat.
Never take more than you need! It only lasts about a week if kept cold, and freezes poorly. Considering this mushroom can get up to and above 35lbs., you could definitely take more than you need without even knowing it.


Couldn't believe we found this beauty this weekend!
I was very lucky this past weekend in finding this gorgeous harvest! While hiking the White Rocks trail in Cumberland Gap, VA, my friend spotted this beauty! We didn’t take much (enough for us and a little to give away to some fellow mushroom lovers). I would say there was at least 25 lbs of mushrooms in this bunch!


The neatest thing about this one, is it lives up to its name! It feels like, cuts like, taste like, and even has the same texture as chicken. It can be used in any dish as a chicken substitute. We used it in a delicious veggie stir fry!


Definatly keep your eyes open for this treasure of the woods and until next time, Happy Hunting!

Weeds, what weeds?


Well Spring has sprung! Bringing lots of goodies with it! Now, I know a lot of people who read this blog live in an urban setting, rather than out in the woods like myself. Well, today I thought I would talk about something that EVERYONE has access too, is one of the most versatile plants, and you probably had no idea you could eat it!

What is it? Well, Dandelions! I bet you have gone into your yard and seen them scattered about, and mostly just tried to get rid of them. But this year, why not try harvesting them!

Fresh Picked Dandelion. Check out those roots!
Dandelions, or Lion's Tooth, can be used in hundreds of recipes, and you can use every bit of the plant. Roots, Leaves, and flowers.
Dandelion leaves can be eaten raw, but are usually very bitter. If you ask people who frequently eat raw dandelions as a salad, they usually coat them with oils, bacon, or vinegar to delute the bitterness.
You can cook them up like spinach as well, but you will have to “boil the bitter out” first.

Coffee in the morning? Try this instead! You can dig up roots of the dandelion, chop it up, roast it, and make a fantastic alternative for coffee beans. You get a simlar coffee taste without the caffeine, and with a lot of great nutrients. For a more in depth, step-by-step process of this, check out this great video!
Dandelion Fritter
You can also seep the roots which make for a very nice tea!

Dandelion flowers are also great in the kitchen! You can eat them raw, sprinkling the petals onto your salad. You can also fry them up in a nice batter and have Dandelion Fritters!

If you have patience, and time, you can use the flowers to make a Dandelion Wine. This is about a 6 month process, but is well worth it in the end!

While I was searching for recipes, I discovered a lot of health benefits from dandelions. They have been used for hundreds of years in Europe and China for medicinal purposes. Check this out:

“It helps to make the gall bladder normal. It is a diuretic. It can purify the bloodstream and liver. It can abate the amounts of serum cholesterol and uric acid. It can heighten the work of the kidneys, pancreas & spleen. It is very helpful to menopausal women. It is useful to treat abscesses, anemia, boils, breast tumors, hemorrhoids, gout, rheumatism, eczema, and cirrhosis of the liver. It has a beneficial effect upon the nervous system. Helps with indigestion. It has a beneficial effect on bladder stones. It is effective for urinary tract infections.”


Now, I’m not saying it’s a cure-all plant, but the vitimans alone are definately good for you. If you do decide to use it for medicinal reasons, I would suggest talking to a doctor first if you are on medications, just in case. And like all other foods, try a little first, and make sure you do not have a reaction to it.

Who knew that this little weed could be put to so many uses!
So get out in the yard and start digging! And until next time, happy hunting!

It's a Land Fish Fry!

Well, the season is finally here! And three weeks early, which is great, because I was getting very impatient. I got a pretty good size harvest the other day, enough for one good serving!
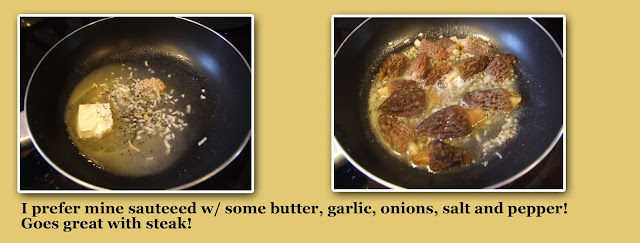
Morels are a really interesting mushroom to eat. Even people who aren't fans of regular mushrooms seem to like these! They taste like a very mild seafood, and have a little bit of a spongy texture. In fact, around this area, they are often called "Dry Land Fish". You can use them in pretty much any recipe that calls for mushrooms, but the two most often cooked I decided to cook up and share with everyone this evening; Fried and Sauteed!
I love them sauteed the best, because the flavor really pops. But, if you are like a lot of 'mushroom haters' its a texture issue, so for those of you who can't get past the texture, I recommend frying them.
I tend to be the cook who just 'wings' it, and doesn't really measure anything, so I apologize in advance for no 'written' recipe. That, and its not really hard to just eyeball the mix.
First, lets see what we need for tonight! About a cup or two of milk, two eggs, about a stick of butter, salt, pepper, and coating. For the coating you can use a couple of things. I prefer crushed corn flake mix (you can buy it at your grocery ready to go). You can use a fish fry batter, crushed up crackers, or, if your desperate for a mix 'shake and bake' can work too. If you use the cornflakes, add some salt and pepper, and thats it!
And now, we are ready to go!!!

So, thats about it! Then feast away! Can't wait to get out and get some more! So...until next time! Happy Hunting!!

PS. The page "The Great Morel" Has some great recipes HERE!

Tricks of the Trade!


While still counting down the days until the foraging seasons are in full swing, I was trying to think of another post for everyone today. I thought I would share some of my tips that I try and follow when I’m out and about in the woods!

Let’s start out with gear. I usually don’t have a whole lot with me, but I never leave home without a few things. I try and always have my cell phone with me just in case, now that it’s such a common thing, it can also be used to keep you safe, especially if you are out by yourself. You never know when you may fall or get injured and will need it! I usually have a camera with me – but it’s not a necessity, just something I like to have.  I always carry a MESH bag. Mesh allows spores and seeds from what you are collecting to fall on the forest floor, and spread the wealth for next year! And finally, I always have a pocket knife with me. The pocket knife serves two purposes. 1. Protection and 2. To cut anything you harvest. In one of my earlier posts, I explained how fungus grow, and if you just rip them out of the ground, you destroy the root system, leaving nothing to regrow through the season and next year. Same goes for anything you can harvest. Why not just cut part of it instead of ripping up an entire plant (fiddleheads for example)?

Another thing … do your research! Hopefully this blog with help a lot with identification, and most things are fairly easily recognized. BUT, there are some look-alikes out there are that poisonous (plants and mushrooms). I almost made this mistake last year harvesting edible flowers. Luckily, I *did my research* and didn’t pick or cook the poisonous ones. Even morels have a couple look-alikes, but if you familiarize yourself with them, you should be ok. Get a field guide to carry around, or download pictures or apps for your phone to help identify. If you have any doubt, Throw It Out! (Or don’t pick at all!!) 


Although I hike on our private land alone, I never go hiking alone away from our yard. My husband or a friend is always with me. You never know who may be on a trail, or if you may get injured and unable to help yourself. You are in the wild, and never know what can happen. A cell phone is great, but you may not have service, or you may be unable to use it. Plus, it’s so much more fun with a buddy!!
When you are doing a day-long hike away from your home, the Boy Scout’s motto is great! Always be prepared! You don’t have to pack the whole house, but a couple things are great to have. A light Jacket or a rain-proof jacket in case the weather changes; water or a hydrating drink (more than one if you can); something to snack on to keep your energy up. I recommend some sort of jerky (beef or turkey) because it’s high in protein and keeps your energy up. Trail mix is good for this too! Matches or a lighter are good to have just in case you get stuck and need to make a small fire. A light backpack should be enough to carry what you need, so it won’t slow or weigh you down.
And the last tip is for when you get home! If you have never eaten something before that you just harvested, try a small sample first. You may have a food allergy you are not aware of, and its best to try a little at first instead of  a whole plate. After that you are good to go!
Please feel free to add to this list! Tips and Tricks are always welcome! Until next time, happy hunting!

Lets Go Hug a Tree!


Today’s post will be fairly short and sweet! I felt it was important to at least touch on the subject of trees and identification, because throughout your foraging seasons, it can always come in handy, AND can even keep you safe! Most mushrooms and some plants tend to favor one or two trees over others, so it’s best to be able to indentify them so you’re not wasting your time looking in all the wrong places! Take Morels for example, I have found in this area they tend to favor Ash trees and Apple trees. That’s not to say you may not find them under or around something else, but most likely, these trees are your best bet! Other mushrooms (for example, the Hen of the Woods) favor very old oak trees. Learning every single tree isn’t really necessary, but knowing the basics can definitely help! Not only can it help you locate edibles, but it can keep you safe. For instance, Chicken of the Woods mushrooms grow on trees instead of around them. When a plant or mushroom grows on another tree, it will absorb the nutrients AND the poisons in that tree. Hemlock, for example is extremely poisonous, and anything growing on Hemlock should not be eaten. Ingesting Hemlock can cause liver and kidney failure within days. 

When in doubt, The Arbor Day Foundation has a great guide that can walk you step by step through identification. A lot of things can be used to tell which tree is which like bark, leaves, stems, and seeds! Below are just a couple of examples of some tree types found in this area.


I cannot stress enough how much you must stay away from ingesting Hemlock. One fairly new telltale sign of Hemlock is something called Woolly Adelgid. This is an aphid-like parasite that has infected almost every Hemlock in the Appalachian Mountains. It was brought here in the 1950s from Japan, and slowly drains the sap out of the trees, killing them as quickly as 5 years. In 1992, the Japanese Ladybug was brought in to help try and eradicate them. This is why in the summer and fall you may notice a LOT more ladybugs than what used to be around. Below is an example of a tree infected with this parasite. It’s a dead give-away for Hemlock. 

If you are really interested in learning more about trees, THIS is an excellent reference. You can also find a lot of field guides in your local bookstore, and I’m sure there “is an app for that” too!  So until next time…Happy Hunting!!